
3. Set up your product background
When shooting product photography, you’re going to need an open space for setting up your backdrop: another essential element to achieve great photos using natural lighting.
Your backdrop should always be white, as white reflects natural light onto the product resulting in an evenly lit photo. A white backdrop is especially helpful in the editing process, as it makes it much easier to remove the background.
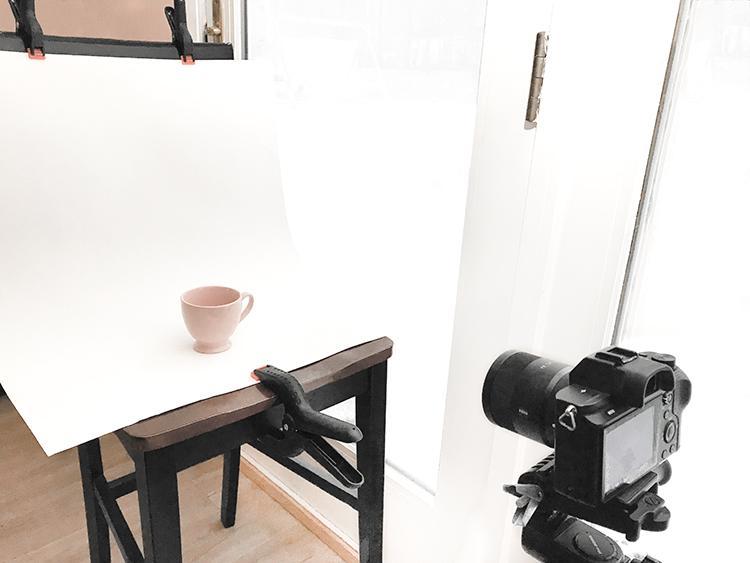
When shooting smaller products, you can either shoot on a table with a large sheet of white paper taped to the wall behind the product. Or you can push a chair up against the wall under a large window. Tape or clamp a large sheet of white paper either to the top of the chair or the wall, depending on what angle you want to shoot from.
If you’re shooting bigger objects, buy a roll of white wallpaper and tape a few long strips to the wall. You could even use a large white sheet and let gravity take care of the rest.
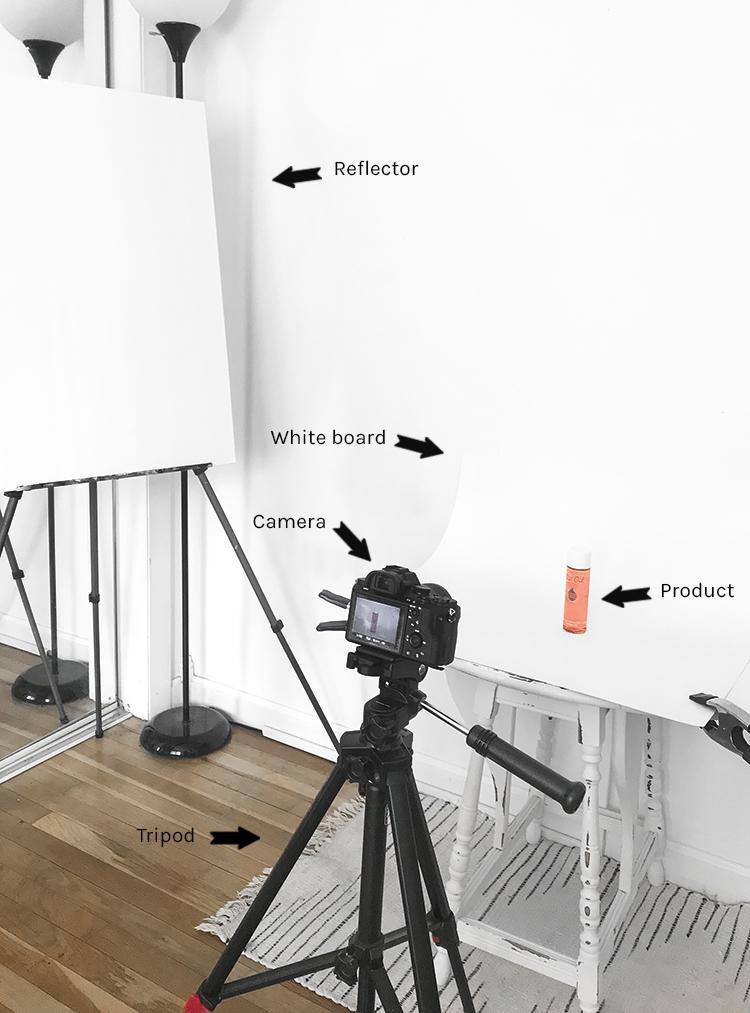
As you can see, I’m shooting against a white wall, leaving plenty of room for a reflector and camera. I used a sturdy piece of white paper and bent it into a slightly curved shape. This helps make the background look seamless and allows the light to bounce back onto the product.
To secure the paper, I clamped it down with some spring clamps from a local hardware store. If you don’t have any clamps, you could always just tape the paper to the wall and tape the bottom to the ground, creating a slight curve in the paper.
It’s essential to secure your backdrop to ensure nothing moves during the photography process. This helps achieve consistent results; even the smallest change will affect the reflections and shadows.
4. Explore different camera angles
Through your product photos, you need to visually answer any questions that your product descriptions don’t fully explain. That’s why having a variety of camera angles is so important.
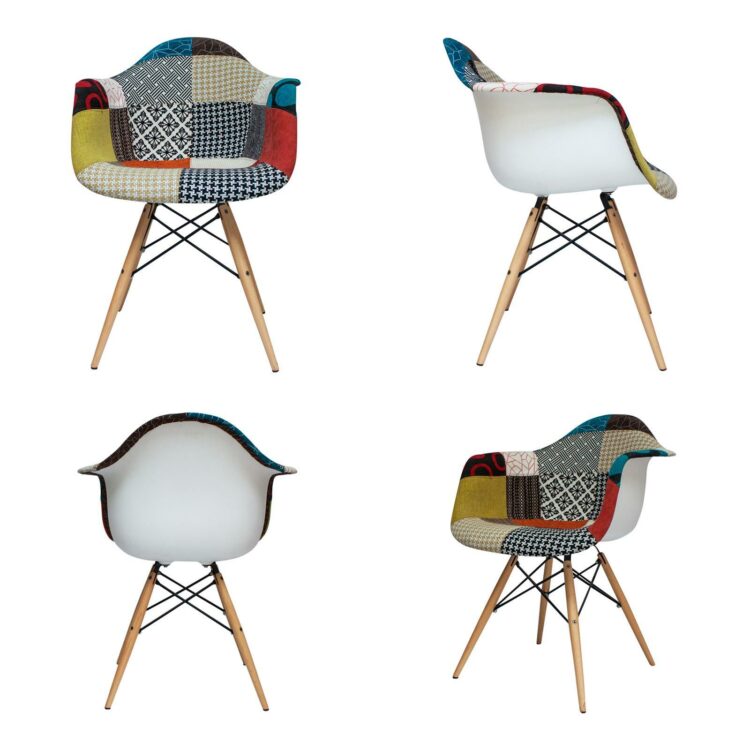
Give customers as many different perspectives to help showcase the key features of your product. The ultimate goal is to shoot your product from every angle, giving customers a 360 degree view of the product. Providing an all-around view is significantly more engaging as you’re visually providing extra product information, helping customers picture themselves using or wearing your product.

By taking product shots from different angles, you’ll also inject some character and creativity into your photos. As a rule of thumb, your main hero image should be an eye-level head-on view of your product. It’s recommended to have anywhere up to 12 additional supporting images highlighting the most important features.
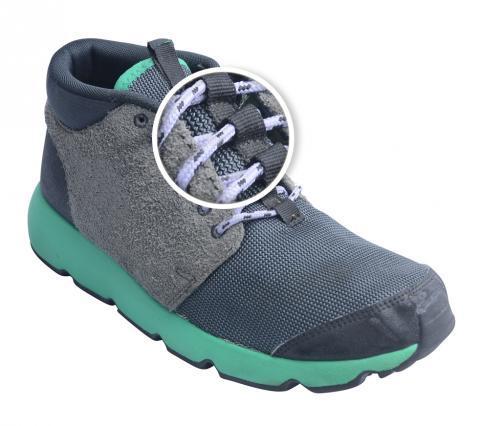
If you’re not sure what features you should capture, focus on features that showcase the quality of your product. Take close-ups of the fabric, print detail, texture, or even your products being put to use. Be sure to highlight the more detailed elements of your product that customers might want to inspect.
For anyone getting started with product photography, it’s highly advisable to move the product around rather than moving your camera. Keep your camera and tripod in the same spot, and change the angle of your product instead of having to move your camera. Keep the product in roughly the same place each time, just rotating its position. This means your final shots will all be framed the same. And you’ll maintain consistency, reducing post-photography editing.
For anyone with a bit more experience or even those with a very steady hand, you could play around with a variety of tripod-free camera angles. Try shooting the product from above instead of directly in front. Shooting from above allows you to include more items in your photo. This is particularly useful when you want to showcase a product line or in-context photo. Or why not have a go at shooting from a low angle, making the product look bigger?

These are the main camera angles you should be aware of and experiment with in your photo shoot:
- Eye-Level: Shows the product exactly the way we see it in reality. This is recommended for your hero image.
- High Angle: Shows the product from above, as if you’re looking down at it from an angle.
- Low Angle: Shows the product from below, as if you’re looking up at the product.
- Bird’s Eye: Shows the product directly from above, as if you’re standing over the product.
- Slanted: Shows the product from one side, as if you’re looking side-on at the product.
